Since this is my first pregnancy I have read every blog, website, pinterest post I can get my hands on. I've also asked hundreds of questions to my already Mommy friends and here's the list I've come up with for necessities during pregnancy, for delivery, and for my own postpartum life. Hopefully, you'll find something useful here as well:
During Pregnancy:
1.
Maternity Pillow: I bought the one that goes under my legs and has a small back support. I LOVE IT! I can't sleep at all without it. Whenever Tim and I have gone on vacation during this pregnancy I have taken it with me, no matter the hassle, because it's SO worth it!
2.
Comfortable Maternity Pants and Jeans: Now, I go back and forth between jeans and stretchy pants. It just depends on the day and what I find most comfortable. I like black stretchy pants because they go with almost everything but when it comes to jeans the best ones I've found so far are the side panel jeans from
motherhood.com. They're comfortable, somewhat stretchy, and I can wear them postpartum as well!
3.
Plan for the Seasons: My first and second trimesters were in the Fall and Winter so it didn't really matter too much what I wore. I bought a lot of just warm, comfortable, stretchy clothing that could change with my growing body. However, it's now Summer {and well I live in Shanghai, China where it's not just hot but also humid, which makes it that much worse} and I've had to figure out what to wear to keep myself covered but also keep me cool. My favorites so far are H&M's colored, light & airy shorts, and simple maternity T-shirts.
4.
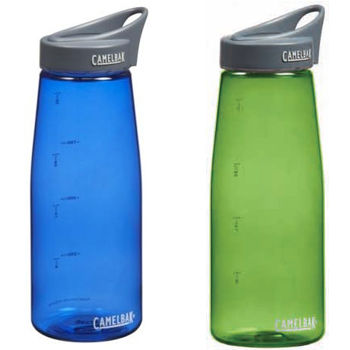
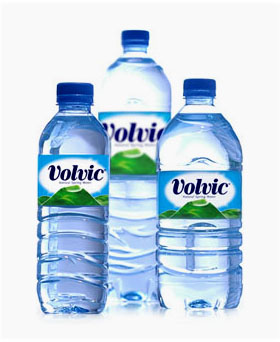
Water Bottles: All of us know we should be drinking lots of water while pregnant. Not only is it healthy for us but for the baby. Our Little Man was actually breech for most of the pregnancy and one of the things I was told was that by drinking lots of water and replacing fluids that it would give him more room to move into the right position. Well, it worked and he's now where he needs to be! But, for me, getting enough water was actually really difficult. I was working full time {we finally just hit our summer vacation at my school}, my schedule was always busy, I had a husband to take care of and spend time with, my body was tired from just being pregnant in the first place, and so I had to find a way to make sure I got enough water every day. At first, I tried taking a re-usable water bottle to work but before long the bottle would start to smell from sitting in the warm rooms and I would forget to take it home to wash it and then I'd have to search the school for paper cups, but then I wasn't sure how much I was drinking in a day...it was a messy cycle. Anyhoo, I finally decided it just wasn't working for me and instead every few days on my way into work I would buy a large 1 litre water bottle and take it with me to school. I would make sure I drank all of it before I left for the day. I would then use it for a few days before it started to smell and then I'd get a new one. I know, I know, not the most environmentally friendly idea but ladies you do what you have to do. I'll make up for it now that I'm not working and have time and energy to actually wash my reusable water bottles. Promise!
5.
Stretchy Skirts for Church or Dates: I found that a lot of my pre-pregnancy wardrobe actually fit {well at least the shirts} during the first 6 or 7 months of my pregnancy but when it came to dressing up for church or a date, or whatever it may be, I needed stretchier skirts. So, I bought three: a black one, a blue one, and a grey one. One to match everything else I had. That way, even as my stomach grew, I was still able to find cute and comfortable "dressy" clothes to wear. I bought mine from Old Navy and H&M.
6.
Weekly Photos {AKA a Camera}: You won't see a lot of changes in the beginning but it's still so fun to record the progress each week. There's a lot of ideas on Pinterest on how to do this so take a look but for me I chose to have Tim {my husband} take a photo each week and then I used Photoshop to remove the background, add in a chalkboard, and then I added all of the information for that week. It was pretty fun for me and I felt more invested in each bit of growth the baby made.
7.
Comfortable Bras: This has really been a struggle for me. The first place I gain weight is in my breasts and so let's just say they got big fast! And because they got so big they started chaffing and the bras I had just weren't working anymore. For me, I found that the best bras are sports bras or really comfortable nursing bras (one of the best pieces of advice I got was to buy nursing bras while pregnant in order to save money, that way you only have to buy so many bras). I have liked the Bravado Body Silk Seamless
Nursing Bra. I just bought them on amazon.com and had them shipped over.
8.
Small/Thin Lining Pads: Ok ladies, here it is, the horrible truth: Women do not start leaking after a baby is born but during pregnancy. This was one of the worst parts of pregnancy for me, having to wear a pad daily even though I was pregnant. But honestly, you are going to want to do it. It saves you from feeling like you need to change your clothes every few hours.
9.
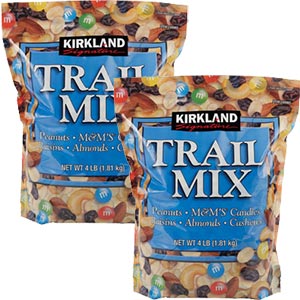
Snacks: I can not stress enough how important it is for you to keep snacks on hand at all times, especially if you're working. As a teacher I try not to eat in front of my students but once I was pregnant there was no way around it. In the beginning they would constantly ask me, "Teacher Bri, why are you eating?" but before long they just accepted it as normal Teacher Bri behavior and understood that the baby "was hungry." During the first trimester I was hungry every 30-60 minutes so I kept trail mix in small baggies in the classroom to eat as soon as I felt the need come on. If I didn't eat I got really sick so that was a great incentive to keep food on hand. Through the second and third trimesters I would go through phases of hunger and the degree of hunger but still needed to keep snacks on hand. Most days look like this: 7:30 Breakfast, 10:30 Snack, 12:30 Lunch, 2:30 Snack, 4:30 Snack, 5:30 Dinner, 8:30 Snack. Pinterest has some great ideas for healthy snacks as well, so make a list of your favorite things to eat, what's easy to keep in baggies for work or on the go, etc.
10.
Prenatal Vitamins: These, of course, are essential. They help not only provide enough folic acid for your baby {plus many other needed nutrients and vitamins} but they help to keep your hormones balanced. You should also continue to take them after delivery {during the postpartum stage} to continue to keep your hormones balanced. I've been taking Nature's Made Prenatals and they've been great!
11.
A Girlfriend, Mom, or Sister Who Has Been Pregnant: There are a lot of strange things that happen to your body during pregnancy and you will wonder if they are normal and the internet does not always help set your mind at ease {webmd, google, and even Pinterest are too quick to jump to negative conclusions} so it helps to be able to talk to someone who has been there. For me, the first time I panicked was when I started bleeding {just slightly} after intercourse {around 6-7 weeks}, I then looked it up online and most scared the he** out of me, so I called my friend and neighbor how had just given birth a year and a half before and she helped me sort it out. Another time, I had a severe leg cramp and she was able to give me advice on how to avoid it in the future. Both things are pretty normal and common for pregnant women but I would not have known that had I not had someone to talk to.
For Delivery:
*Note: Your doctor should give you a comprehensive list of what you need to bring to the hospital with you but these are my suggestions:
1.
Your Favorite Drinks: You are most likely going to be in labor for a long time, bring something refreshing for you to drink if needed. Also, bring a large water bottle and keep it filled in the delivery room.
2.
Snacks: Again, you're going to be there for a while. Take some snacks with you. My doctor specifically recommends chocolate but honestly it can be anything you think you might like or even just something for whomever is there supporting you as they'll probably get hungry too.
3.
Camera: You may not want photos of the entire birthing process but you'll most likely want some photos right after delivery {of the baby} so make sure to bring it with you just in case.
4.
A List of Breathing Techniques: This is where Pinterest comes in handy again. Whether you're planning to have an medicated or non-medicated birth there will still be a period of time when you're going to feel the contractions and you'll want some breathing techniques to get you through them. The best site I have found so far is:
Hubpages. You'll also want to practice these before you get to the hospital.
5.
Lip Balm and Lotions: I've heard that most women get really dehydrated during delivery, your lips and skin get really dry, so just bring along some lip balm and lotion to help keep yourself feeling refreshed and relaxed. The lotion is also great massages as well. Get your husband {or whomever is there with you} to massage your back, you arms, your legs, whatever you feel needs it the most.
Your Stay at the Hospital & Postpartum:
*Note: Again, your doctor should tell you what your hospital will and will not provide for you and the baby so be sure to ask. Here in China, pretty much nothing is provided for you so my list is pretty long, but you may be able to cross some of it off your own list.
1.
Mesh Underwear or Depends: I have both of these in my suitcase right now plus a small stack of large pads. I've read that the mesh underwear is most comfortable, breathable, and supportive than depends but you'll probably have to try them out for yourself. But either way, one of these items is absolutely necessary for the first couple of days after delivery.
2.
Large Underwear and Large Pads: Once the main bleeding stops you can move on from the granny panties and wear actual underwear. I would recommend getting at least as size bigger than normal so that you can fit a large pad in there as well as some other things {see below}.
3. Tuck's Medicated Cooling Pads and Ice Pads: These are some of those things you may be putting in your underwear. You will probably find there's a time when you just need to help soothe the pain. I've read that you'll want to use 1-2 of these each time you go to the bathroom. My mom is bringing me these from the States so that I'll have them. She didn't seem to think I'll need them but I reminded her that it's been 17 years since she gave birth to her last child and has probably forgotten the pain that comes even after child birth. Maybe that's a blessing though and hopefully one that I will also receive: the ability to forget the pain!
4. Dermoplast Numbing Spray: This is also to help with the pain. Make sure you get the one with the blue lid. Again, I have my mom bringing me this from the States and I'm so happy she's coming or I don't know what I would do!
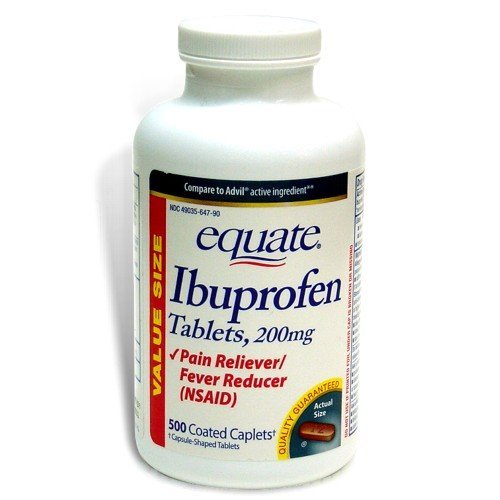
5. Ibuprofen Tablets: Motrin or straight Ibuprofen, whichever you prefer, is also a necessity. Just to help ease any of the after birth pain. Did you know that there are after birth contractions???? Let's just say I'm not excited about that. I always figured that once your child was born that was it, you were done, the pain was over, but oh no, it's going to keep going for a while. Note: Please remember to consult with your doctor though before you take any type of medication, including the Ibuprofen, just to make sure you're OK to have it. If you can't take it, I'm sure there's something else your doctor can recommend.
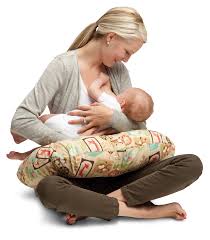
6. Nursing Pillow, Nursing Pads, and Nursing Bra(s): If you are choosing not to nurse you won't need the pillow and bra but you will still need the pads for the first few days until your milk stops. For those that choose to nurse you will need all three! My mom again made fun of me for getting a nursing pillow {i.e. a boppy} but it just makes so much sense to me to have a pillow that will go around your body and support the baby instead of trying to get regular pillow(s) into the right position just so you can nurse. Come on ladies, save yourself the hassle, energy, and time, and just get a boppy!
7. Lanolin Cream or Coconut Oil: Again, this is only if you are nursing. You should start using it two or so weeks before you delivery just to help prepare your nipples for what is about to come! If you have a difficult time nursing and your nipples get really sore or bloody then use the lanolin cream until it's under control. If your nipples have normal chaffing and soreness then I suggest you only go with the coconut oil. It's natural and it smells amazing! It's also great for your stretchmarks....
8. Comfortable PJ or Exercise Pants: After the delivery you're going to want to wear only comfortable, stretchy clothes for a while, especially during those first two weeks you're home with baby. I just bought a pair of black, thin exercise pants from H&M to wear at home. And again, I plan to continue to wear my maternity side panel jeans anytime I go out. Yoga pants also work great. Really, it's just anything that feels good around your stomach and that is comfortable.
I think that's finally it! Wow, that was a lot longer list than I thought it would be. Hopefully, you found it useful though. Good luck on getting pregnant, being pregnant, delivering, and/or your postpartum life after delivery!


